
Patient Admin
- Let's Get Started!
- Get Familiar With Your View!
- Search
- Delete
- Columns
- Density
- Customize Your View
- Video View
In this article, we will embark on a deep and mystical exploration of the Patients Tab. We will traverse through various topics, unveiling the secrets of how to customize and edit your view for optimal usability. You will discover methods of efficiently searching for specific patients within the system, and the precise steps required to delete patients when necessary. By the end of this journey, you will possess a profound understanding of how to navigate and masterfully manage the Patients Tab.
Let's Get Started!
- Navigate to the Practice Settings tab on the left navigation pane. Then select “Patients” from the top menu.
Example View


Get Familiar With Your View!
- Search: Use this section to quickly find your patient by searching for specific information. You can search by first name, last name, medical record number, date of birth, gender, address, or member ID.
- Columns: To personalize your view, select "Columns." You can easily add or remove columns to display the information most relevant to you.
- Density: Adjust the row spacing by selecting "Density." This option allows you to customize the display by making rows wider or narrower to fit your preference.
- Delete: To remove a patient from the database, select the trash icon next to their name. Please note that deleting a patient is permanent and cannot be undone.
Example View

Search
- To locate a patient, enter their information into the search bar. You can refine your search by using the patient's first name, last name, medical record number, date of birth, gender, address, or member ID.
Example View

Delete
- To remove a patient, click the trash icon next to their name. A confirmation window will appear. Select "Yes" to permanently delete the patient record. Please note that deleted records cannot be recovered.
Example View


Columns
- To customize the information displayed, click the "Columns" button. This allows you to add or remove specific columns based on your preferences.
Example View

Density
- Adjust the row spacing by selecting "Density." This option allows you to customize the display by making rows wider or narrower to fit your preference.
Example View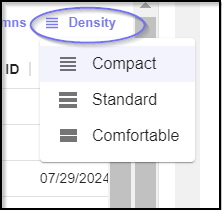
Customize Your View
- Ellipsis / Menu - To customize a column, click the Ellipsis icon located at the top of the column. This allows you to pin, sort, filter, hide, or manage the column's display.
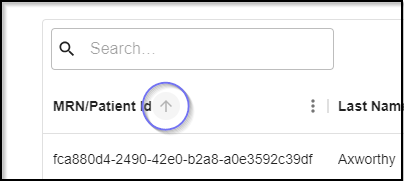
- Up or Down Arrow / Sort - To sort the data within a column, click the sorting icon at the top of the desired column.
- Rows Per Page - Use this option to specify the number of rows displayed per page.
- Next and Previous Icon - Utilize these controls to navigate between different pages.
Example View

Video View
We're here to guide you through your prior authorization quest!

Was this article helpful?
That’s Great!
Thank you for your feedback
Sorry! We couldn't be helpful
Thank you for your feedback
Feedback sent
We appreciate your effort and will try to fix the article